Generating Self-Signed SSL Certificates for Use with Bluemix Custom Domains
This is a companion piece to another post on SSL Certificates and Custom Domains in the IBM Bluemix UI. It's intended for Bluemix users who wish to use self-signed SSL certificates with their custom domains for testing and development. This can be useful before acquiring a wildcard certificate issued by a trusted third-party certificate authority.
This is a companion piece to my Bluemix UI: SSL Certificates and Custom Domains post. It’s intended for Bluemix users who wish to use self-signed SSL certificates with their custom domains for testing and development. This can be useful before moving to production with a wildcard certificate issued by a trusted third-party certificate authority.
I’ll discuss three different approaches using:
- an online certificate generator
- the
opensslcommand line tool - the Mac’s Keychain Access app (which facilitates acting as your own certificate authority)
Once you’ve generated a self-signed certificate using one of these approaches (or by one of the many approaches found doing a Google search, please see my previously mentioned post to learn how to associate it with a Bluemix custom domain.
Online Self-Signed Certificate Generator
A really straightforward way to generate a self-signed certificate is the online Self-Signed Certificate Generator. All you have to do is enter a wildcard domain and hit the Generate button.
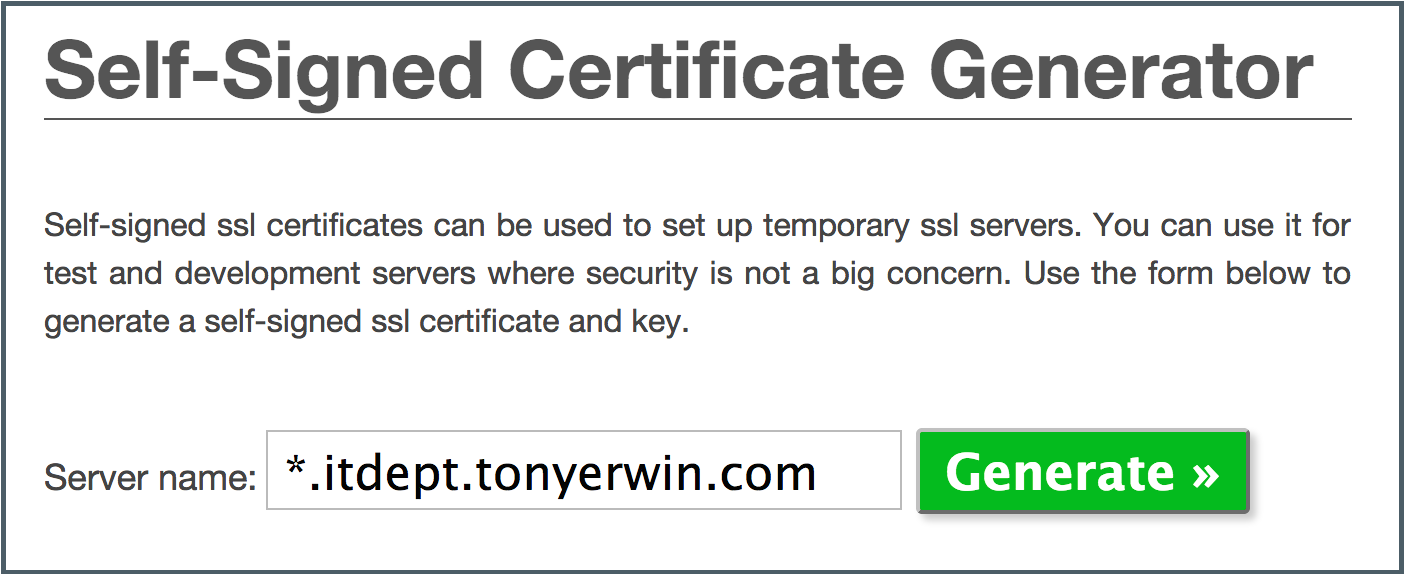
The site then uses OpenSSL in the background to generate a certificate and private key. After the process completes, you will see two links: one allows you to download a cert file and the other a key file. Download the files, and then you can use the Bluemix UI to upload and associate them with your domain.
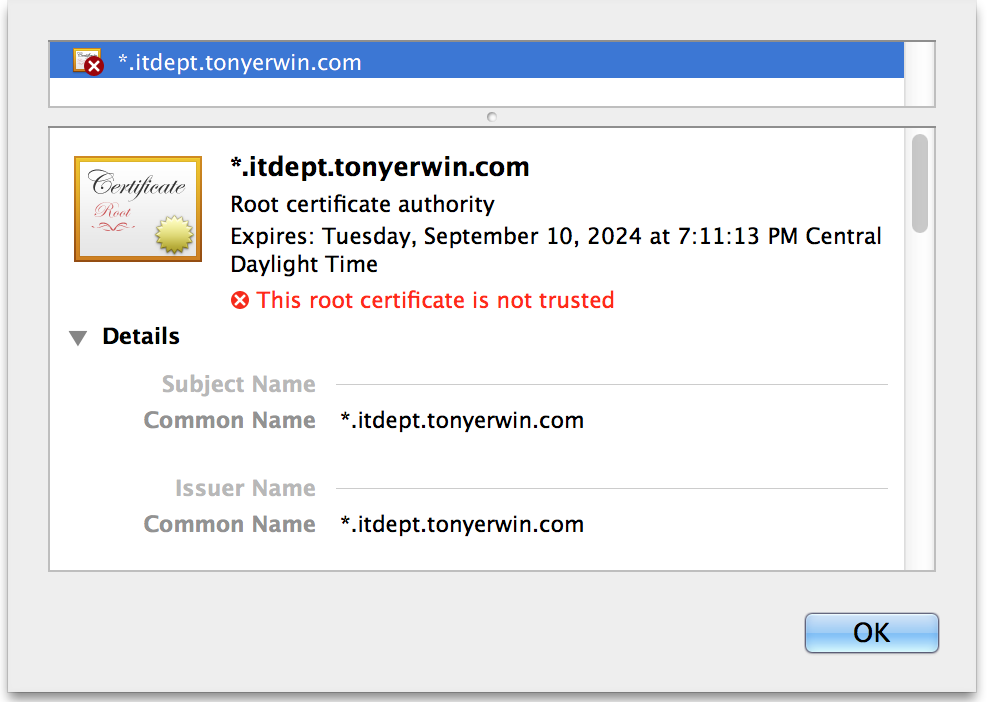
I did this myself for one of my domains. When I accessed the app in Chrome, it provided me with the certificate details shown below. As you can see, the generated certificate only has the Common Name field filled in. And, of course, Chrome doesn’t trust it.
Using OpenSSL to Generate Self-Signed Certificate
If you want more control over the generated certificate, you can use the openssl command directly. It may already be installed on your system, but if not, you should be able to install it. The steps below are adapted from the first 4 steps of How to Create a Self-signed SSL Certificate by Akadia.com. That article gives additional background information and guidance that you may find useful.
- Generate a private key.
1
2
3
4
5
6
$ openssl genrsa -des3 -out server.key 1024
Generating RSA private key, 1024 bit long modulus
........++++++
.................................................++++++
e is 65537 (0x10001)
Enter pass phrase for server.key:<br />Verifying - Enter pass phrase for server.key:
- Generate a CSR (Certificate Signing Request). For use with Bluemix, the most important thing to remember is to specify a wildcard domain for the Common Name field. I’ve highlighted the
opensslprompt for that in the console output below.
1
2
3
4
5
6
7
8
9
10
11
12
13
14
15
16
17
18
19
20
$ openssl req -new -key server.key -out server.csr
Enter pass phrase for server.key:
You are about to be asked to enter information that will be incorporated<br />into your certificate request.
What you are about to enter is what is called a Distinguished Name or a DN.
There are quite a few fields but you can leave some blank
For some fields there will be a default value,
If you enter '.', the field will be left blank.
-----
Country Name (2 letter code) [AU]:US
tate or Province Name (full name) [Some-State]:MN
Locality Name (eg, city) []:Rochester
Organization Name (eg, company) [Internet Widgits Pty Ltd]:Tony's Bluemix Demos
Organizational Unit Name (eg, section) []:IT Dept.
Common Name (e.g. server FQDN or YOUR name) []:*.itdept.tonyerwin.com< <-- must be wildcarded
Email Address []:[email protected]

Please enter the following 'extra' attributes
to be sent with your certificate request
A challenge password []:
An optional company name []:
- Remove the passphrase from key.
1
2
3
4
$ cp server.key server.key.org
$ openssl rsa -in server.key.org -out server.key
Enter pass phrase for server.key.org:
writing RSA key
- Generate a self-signed certificate.
1
2
3
4
$ openssl x509 -req -days 365 -in server.csr -signkey server.key -out server.crt
Signature ok
subject=/C=US/ST=MN/L=Rochester/O=Tony's Bluemix Demos/OU=IT Dept./CN=*.itdept.tonyerwin.com/[email protected]
Getting Private key
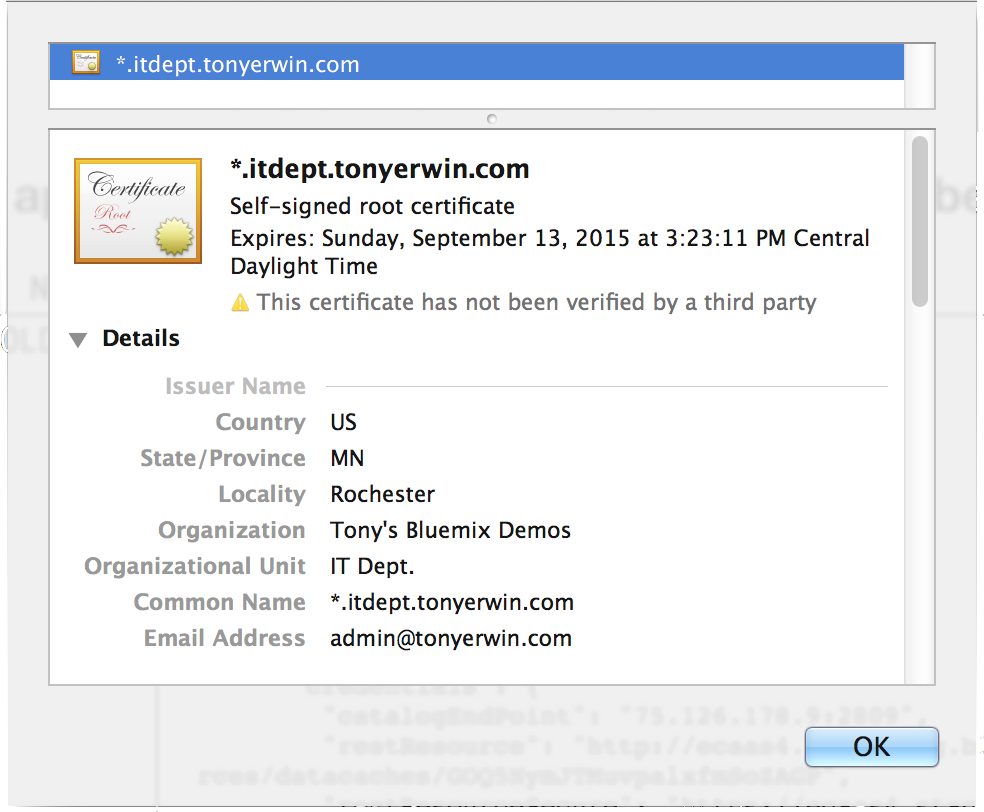
At the end of this process, you’ll have two files: server.crt and server.key. Like before, these files can be uploaded via the Bluemix UI. The screenshot below shows the details as provided by Chrome when I access my app. The certificate is still untrusted, but you can see many more fields are populated with data.
If you want to go deeper with openssl, you can even generate your own intermediate certificates and use them to sign your main certificate. For example, see the article How to act as your own certificate authority (CA) by Jamie Nguyen.
Using Keychain Access on Mac to Be Your Own Certificate Authority
Depending on your platform, you may have graphical tools at your disposal to create and manage certificates. For example, on a Mac you can use Keychain Access. In the rest of this section, I’ll walk you through using Keychain Access on Mac OS X (Version 10.9.4) so you can act as your own certificate authority. You’ll first create a self-signed intermediate certificate which you’ll mark as trusted. You’ll then use this trusted intermediate certificate to issue a new certificate specific to your domain. Finally, you’ll export the files from Keychain Access and upload them to Bluemix. After that, you should see no SSL security warnings when accessing your web app from a browser on your local system.
Create Your Own Certificate Authority
First, follow the steps below to create a new certificate authority:
- Launch Keychain Access.
- Choose the Keychain Access -> Certificate Assistant -> Create a Certificate Authority… menu option.
- On the resulting dialog:
- Fill in the Name field.
- Ensure the Identity Type select box is set to Self Signed Root CA.
- Leave User Certificate set to S/MIME Email or change to SSL Server.
- Leave Let me override defaults unchecked.
- Optionally uncheck Make this CA the default.
- Specify a value for Email from.

- Click the Create button.
- Close the dialog which says Conclusion and tells you creation was successful.
- Within the main Keychain Assistant window, find your new certificate and open it (either double-click on it or invoke the Get Info context menu item).
- On the resulting dialog, change the select box for When using this certificate to Always Trust.
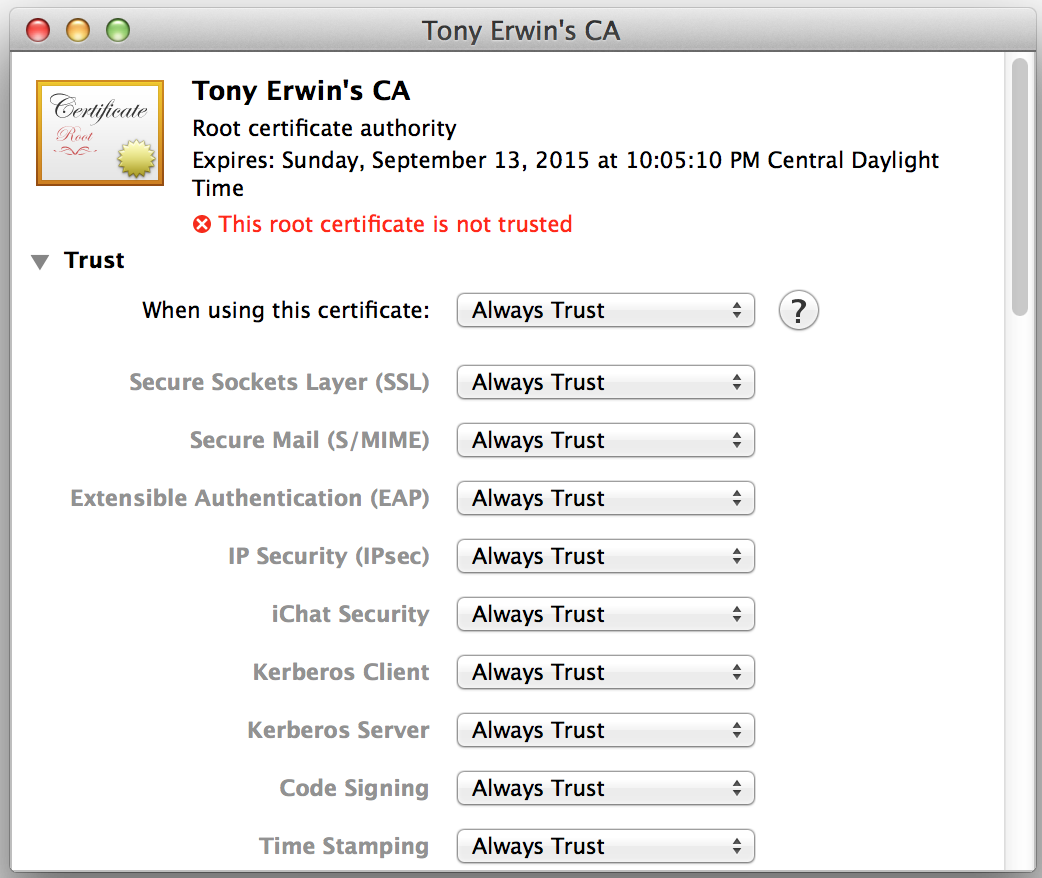
- Close the dialog. You will then be prompted for an administrator user name and password. After entering your credentials, click the Update Settings button.
You now have a self-signed certificate authority that is trusted by your local system.
Create Your Main Certificate
Next, you will create the main certificate for your domain. We will issue it using the trusted certificate authority you created in the previous section.
- In Keychain Access, choose the Keychain Access -> Certificate Assistant -> Create a Certificate… menu option to show the Create Certificate Wizard.
- On the first panel of the wizard:
- Fill in the Name field.
- Ensure the *Identity Type select box is set to Leaf.
- Set the Certificate Type field to SSL Server.
- Check the box next to the Let me override defaults option.
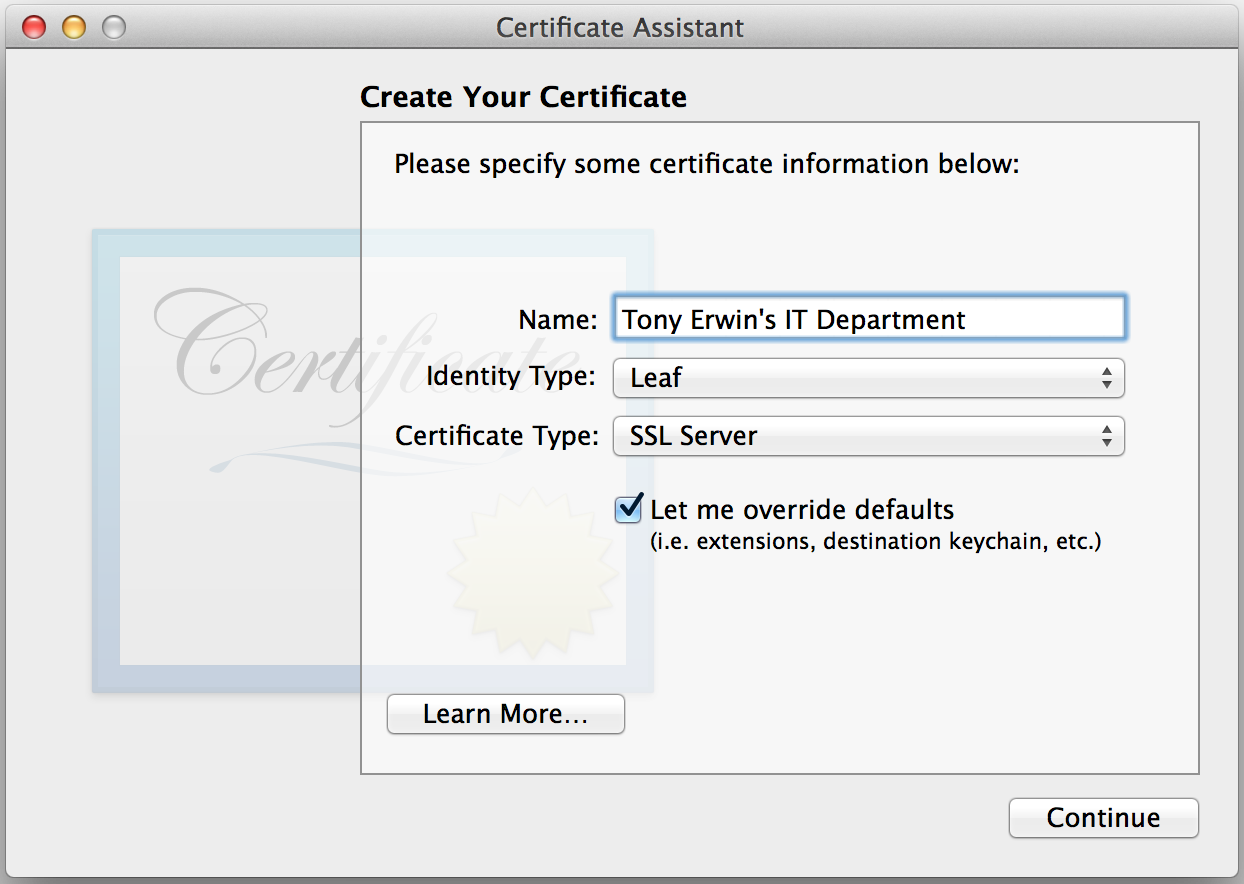
- Click the Continue button.
- On the next panel, you can optionally adjust the Serial Number and Validity Period fields. Then, click the Continue button.
- You will then see a panel with a number of important attributes. Fill in all of the fields, but pay particular attention to the Name (Common Name) field. This field must be the wildcard version of the domain you wish to secure in Bluemix.
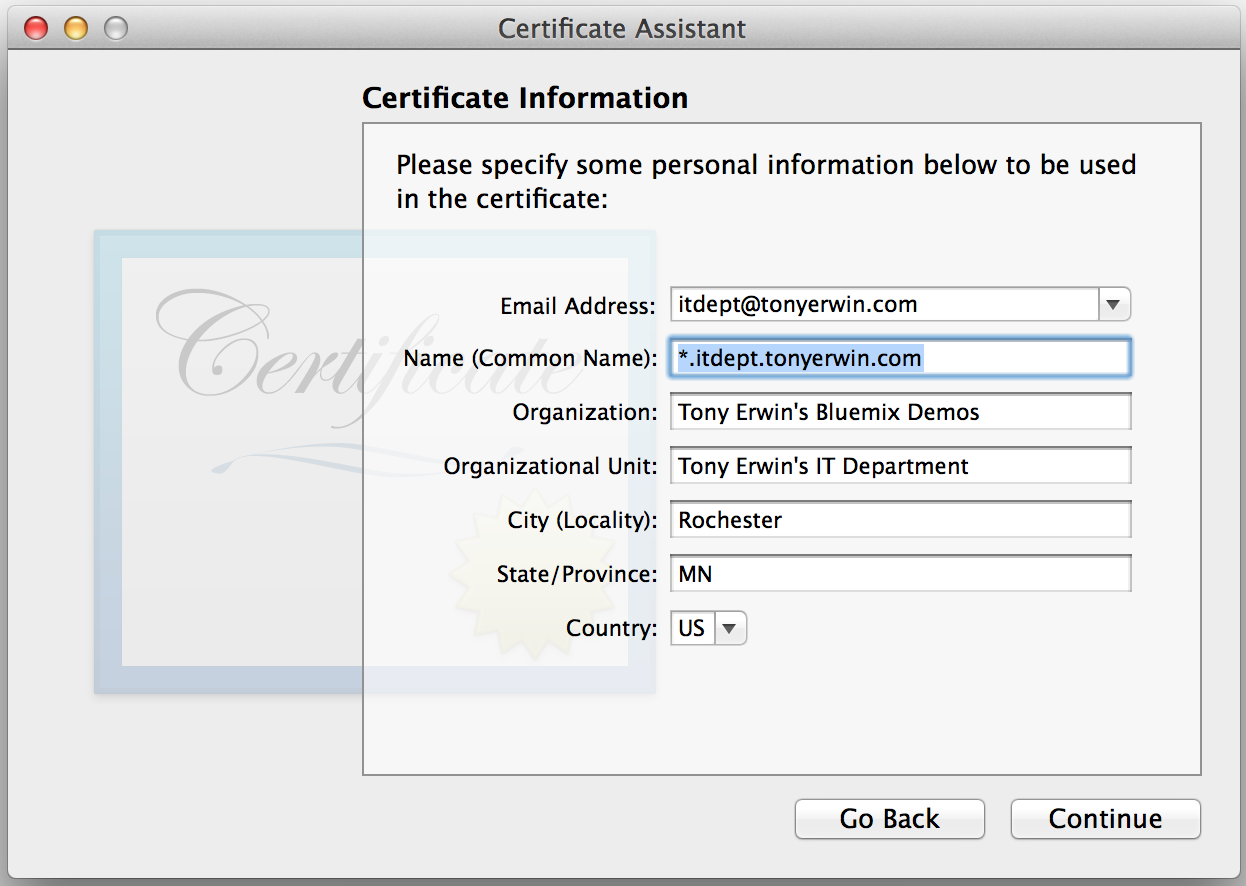
- Click the Continue button.
- You will then be given the option to choose the issuer for your new certificate. You will want to make sure to choose the certificate authority you created in the previous section.
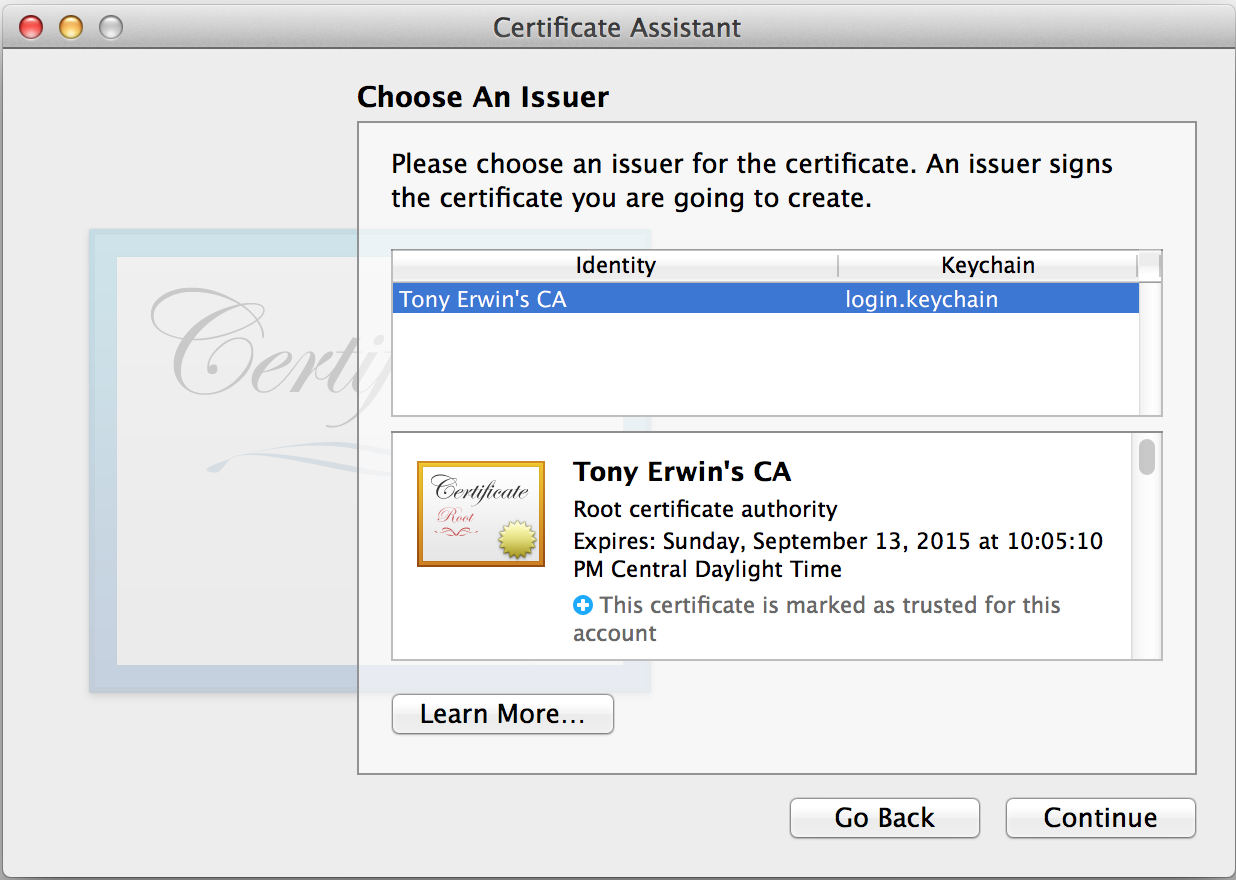
- Click the Continue button.
- On the next panel, you can leave the Key Size and Algorithm Fields alone. Then, click Continue.
- On the Key Usage Extension panel, you have a variety of options. The only item I enabled is the Signature field.
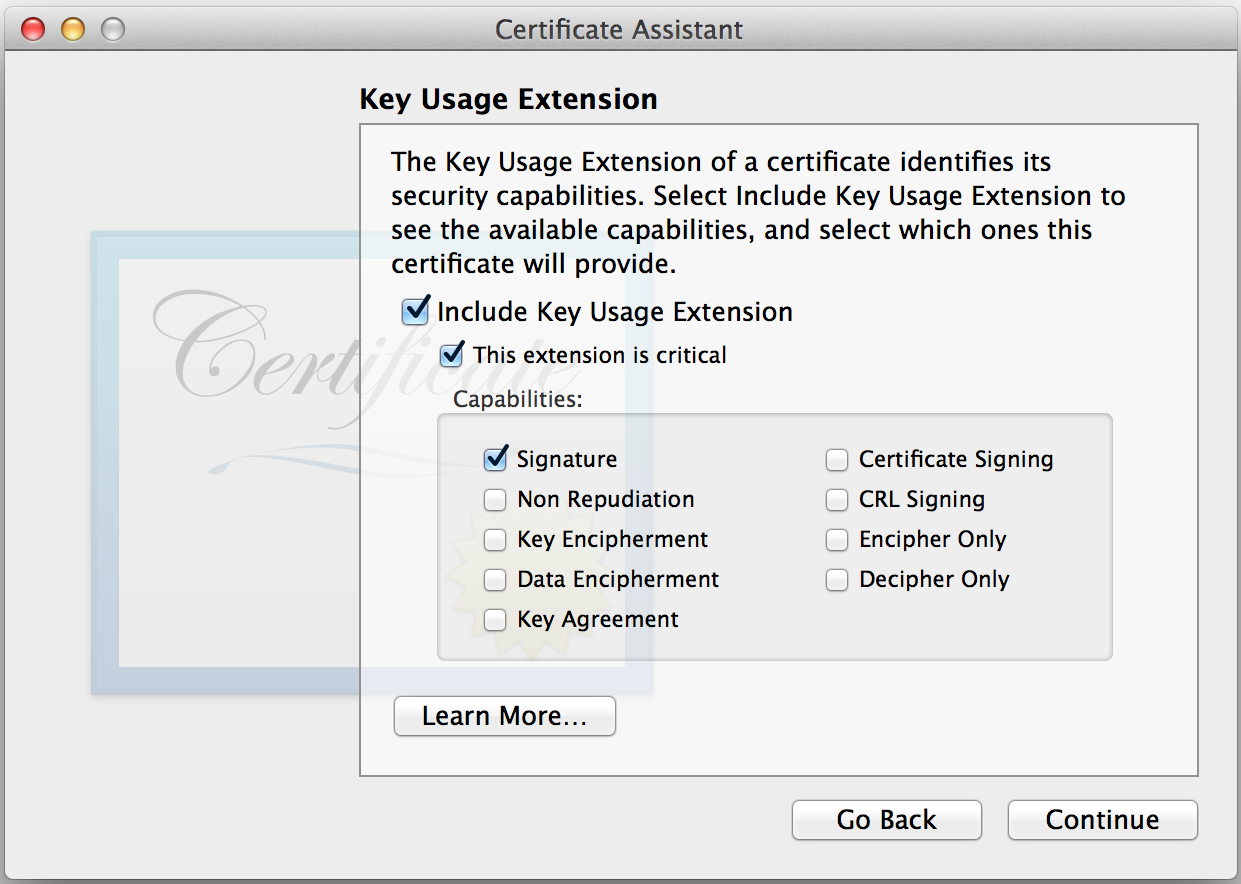
- Click the Continue button.
- On the Extended Key Usage Extension panel, check the box next to the SSL Server Authentication Option.
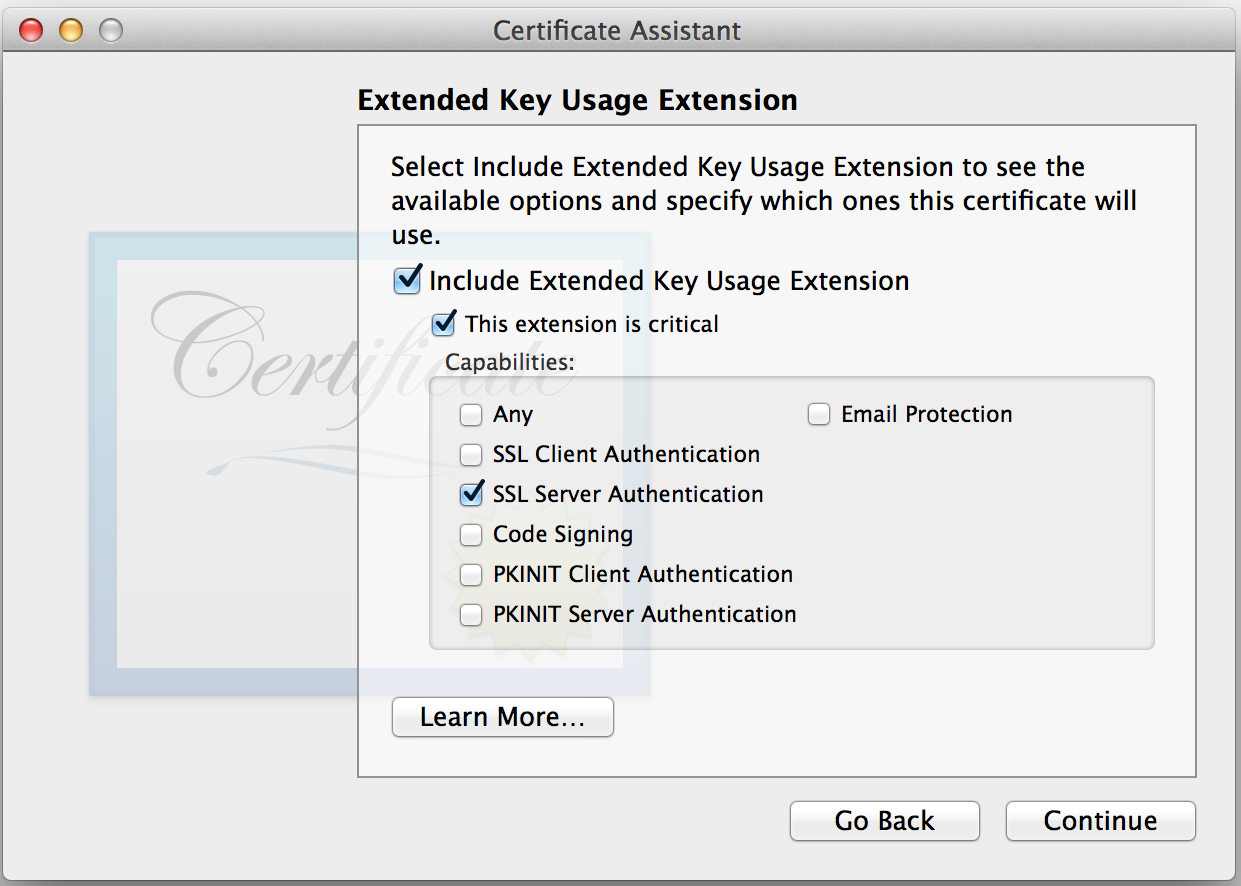
- Click the Continue button.
- For the Basic Constraints Extension panel, you can leave the checkbox unchecked and then click the Continue button.
- For the Subject Alternate Name Extension panel, uncheck the box next to the Include Subject Alternate Name Extension field.
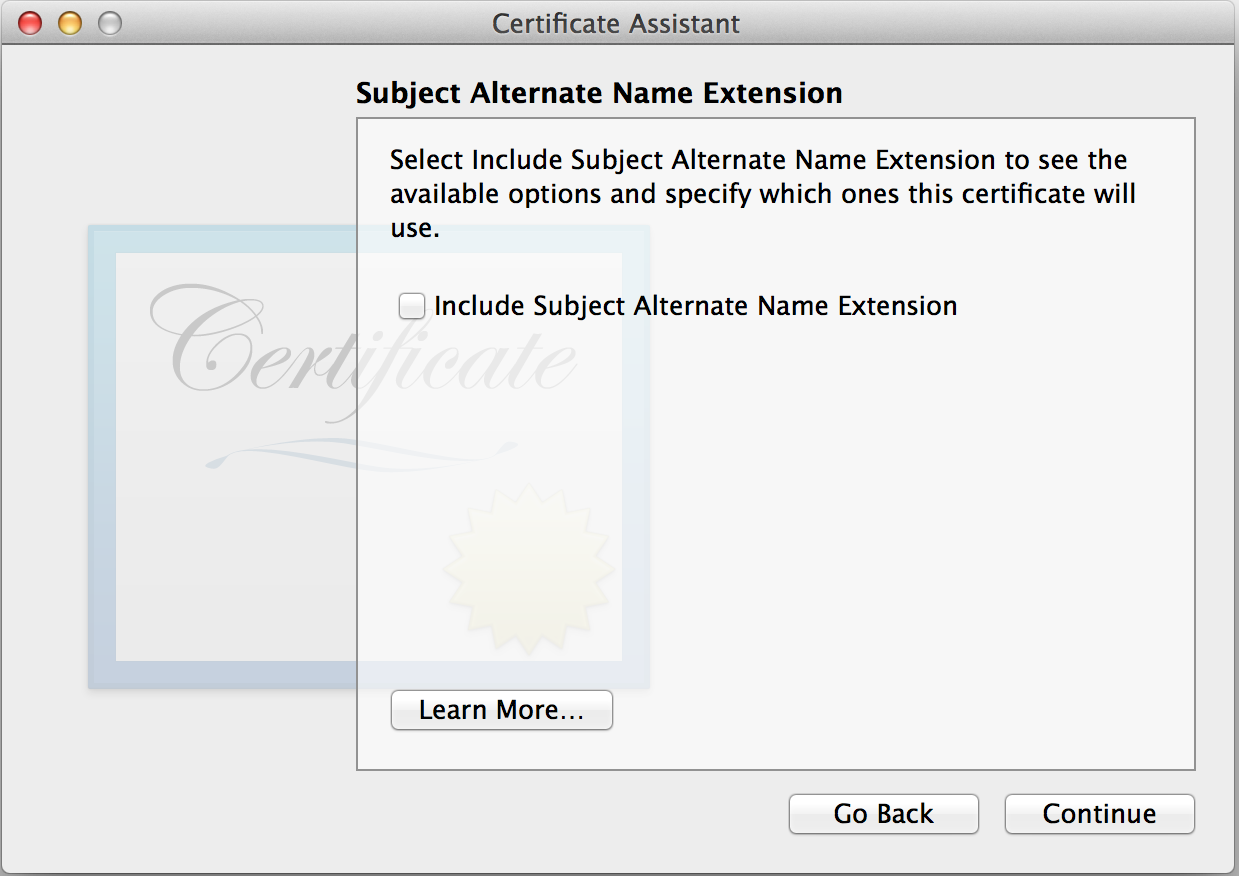
- Click the Continue button to arrive at the Specify a Location for the Certificate panel. You can leave the Keychain field set to login.
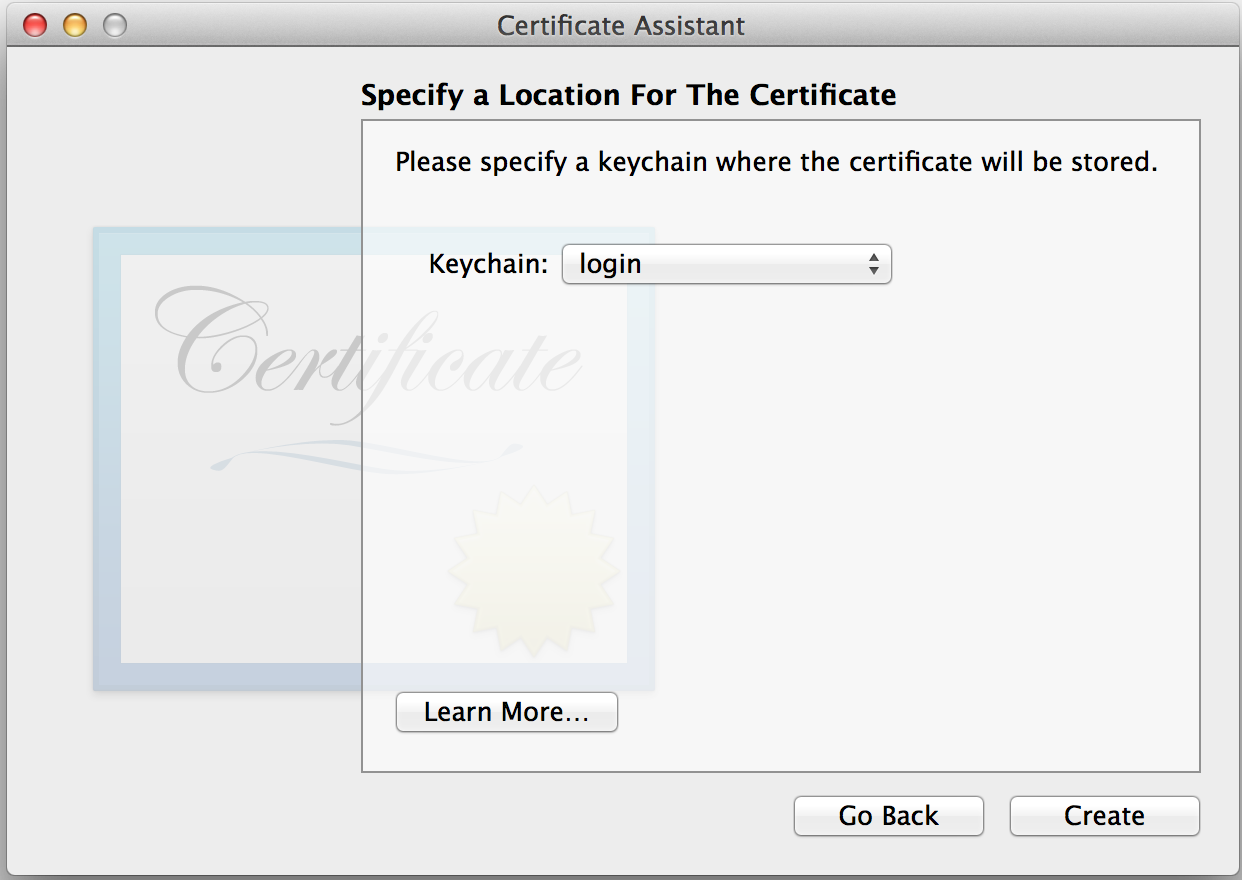
- Click the Create button and the Conclusion panel will be made visible. You should see a summary of the information for your new certificate.
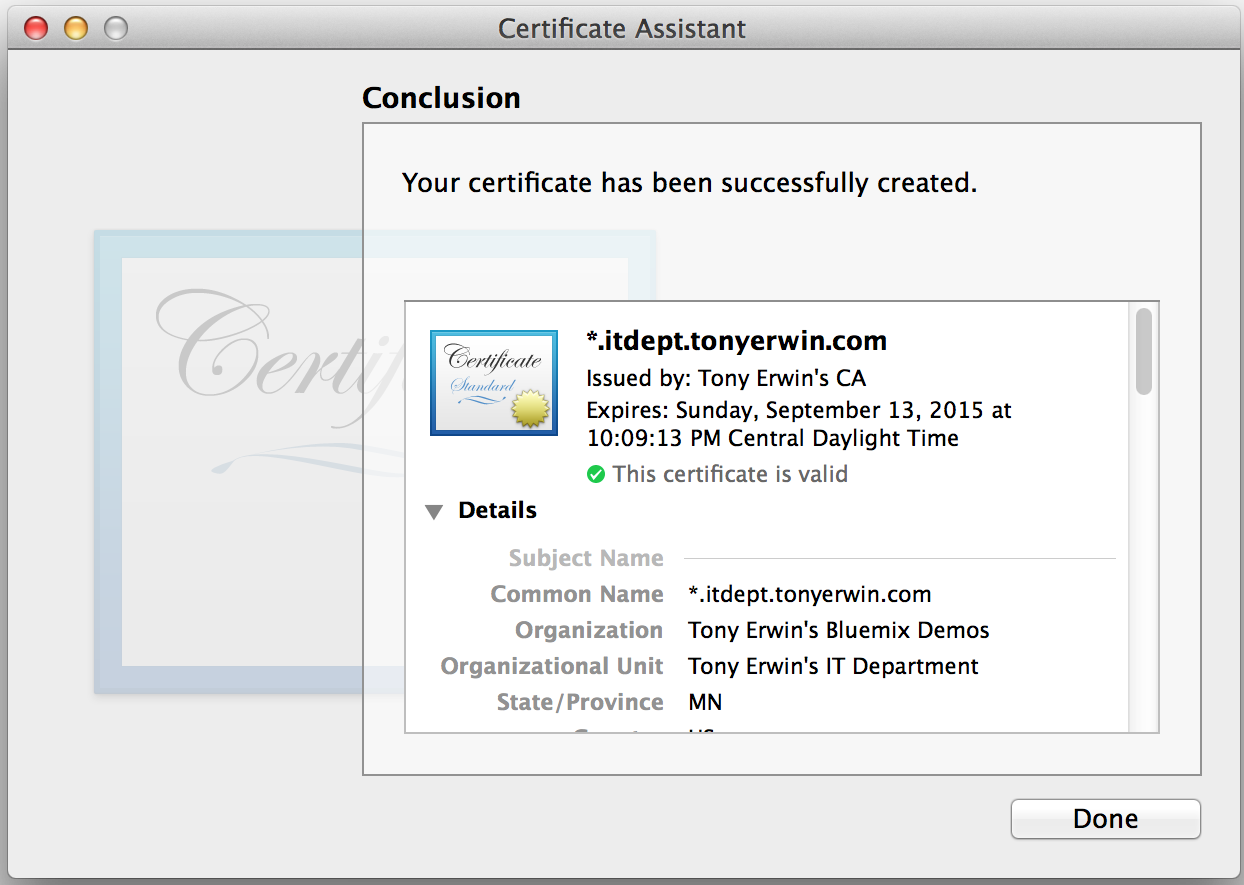
- Click Done.
Export Certificates
Now, you have created a certificate authority and used it to issue a new certificate. The next thing you need to do is export the files from Keychain Assistant so you can upload them to Bluemix:
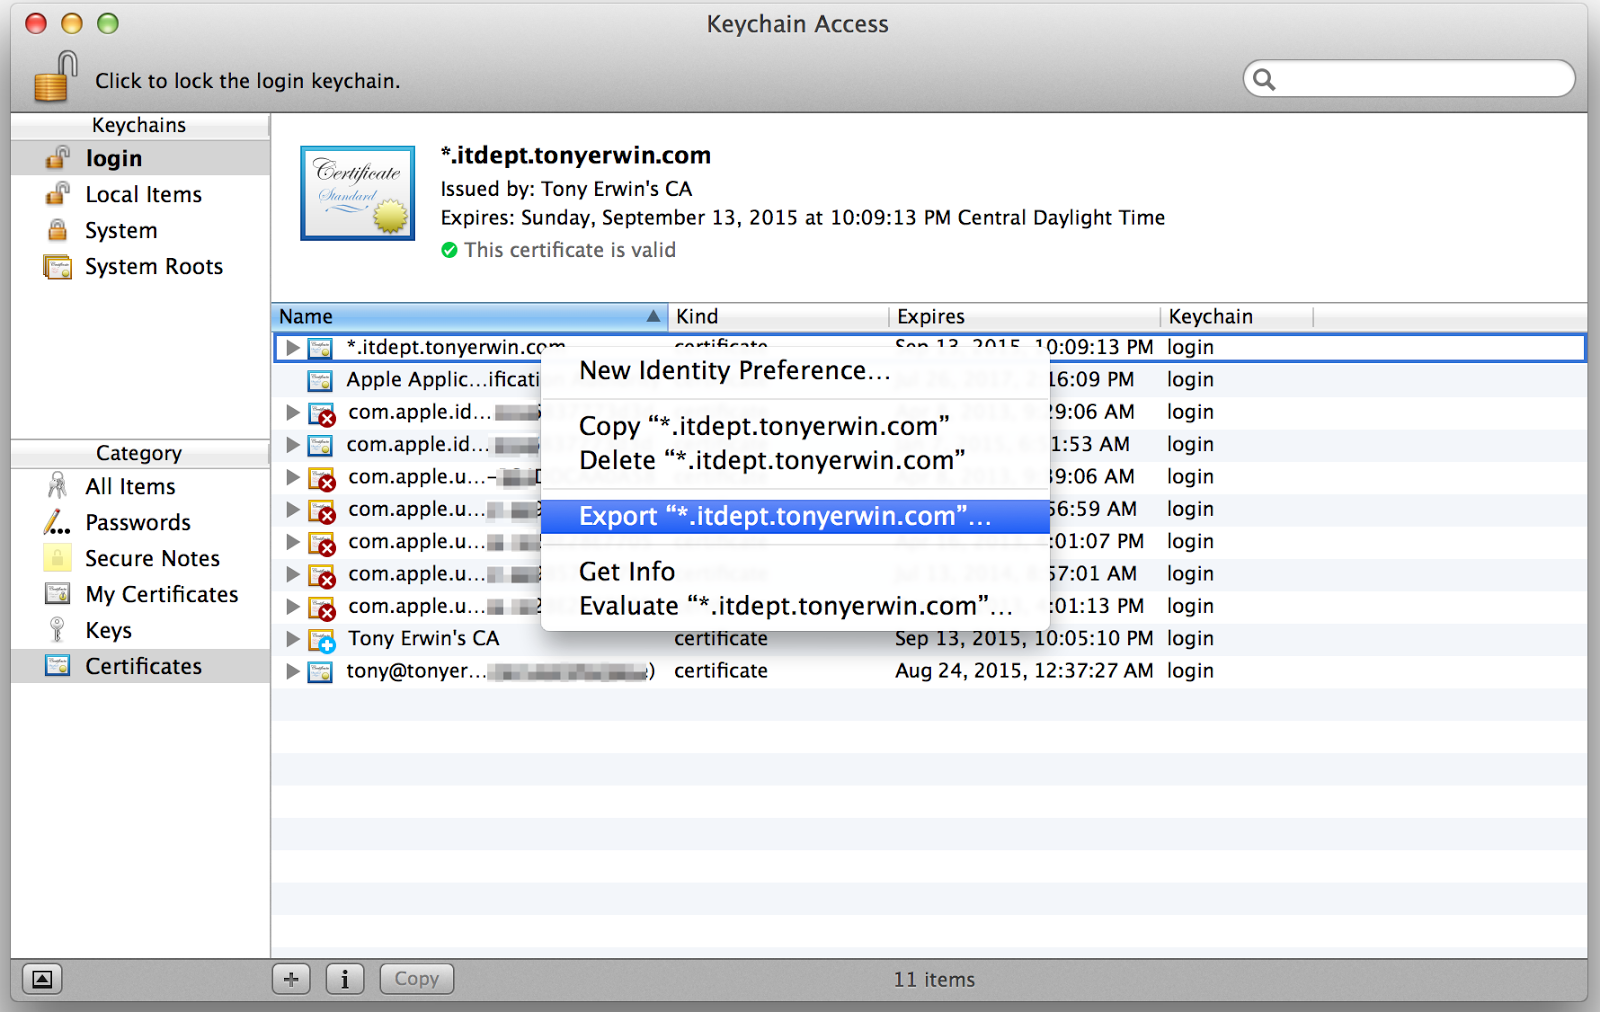
- In the main Keychain Assistant window, find your main certificate. In the context menu, choose the Export option.
- You then get to choose the location for your exported certificate. You can choose whatever you want for filename (for example,
server), but it’s very important you choose Certificate (.cer) for the File Format.
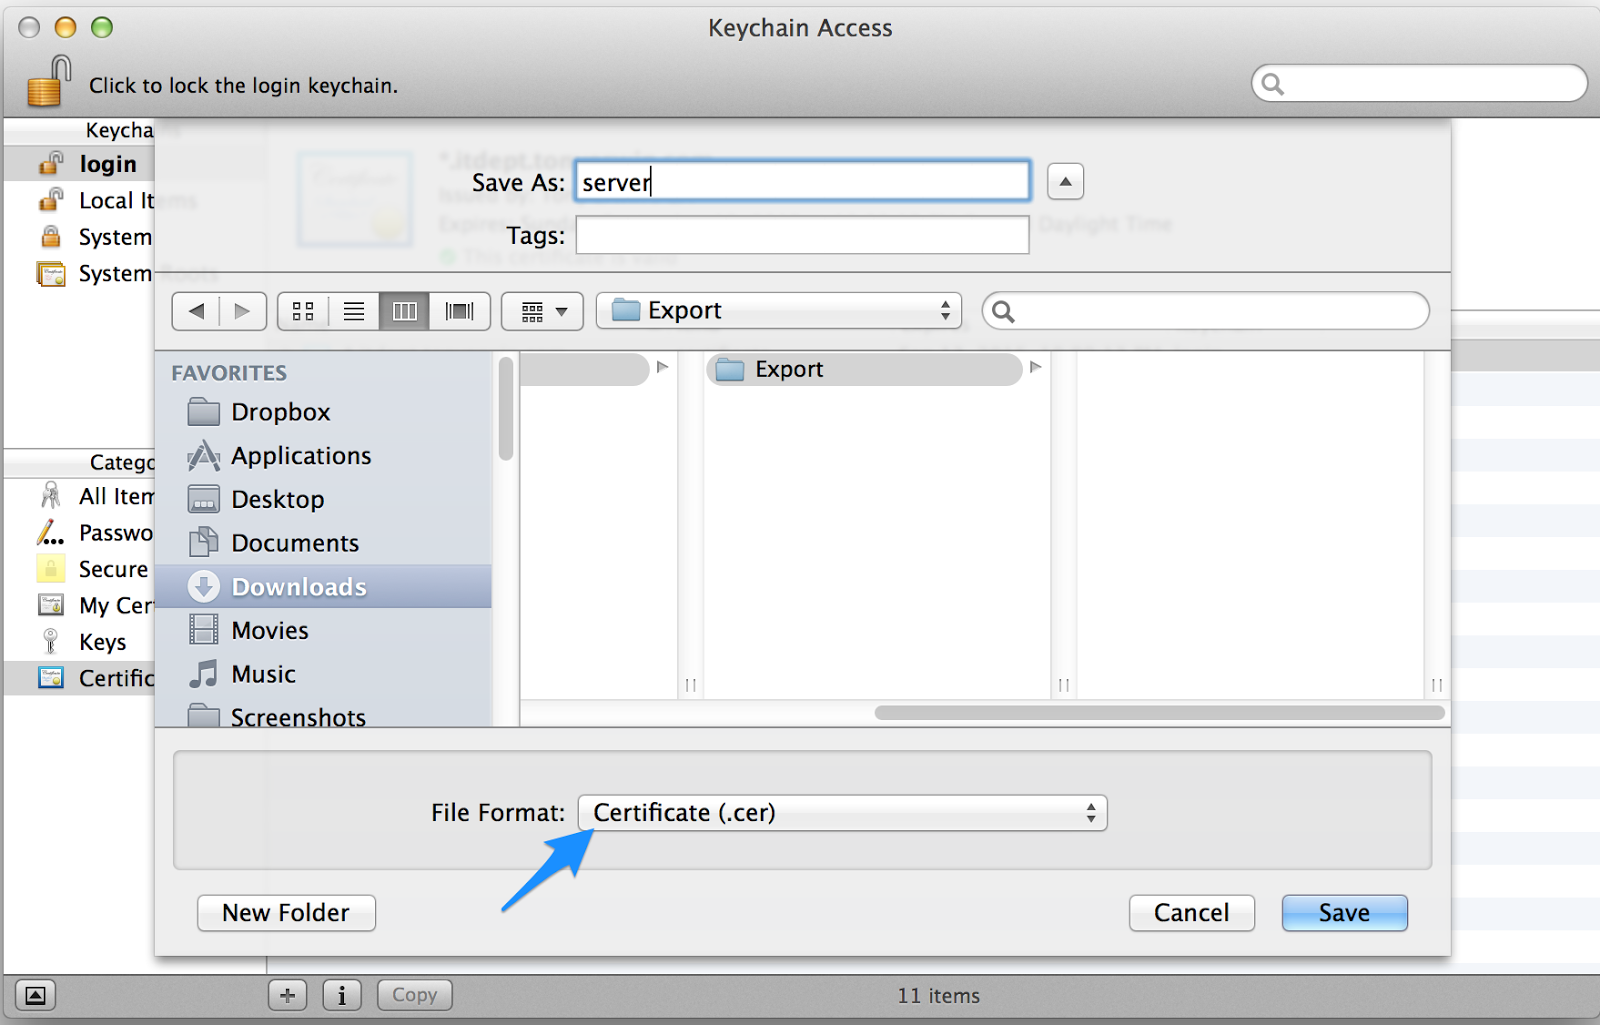
- Click the Save button.
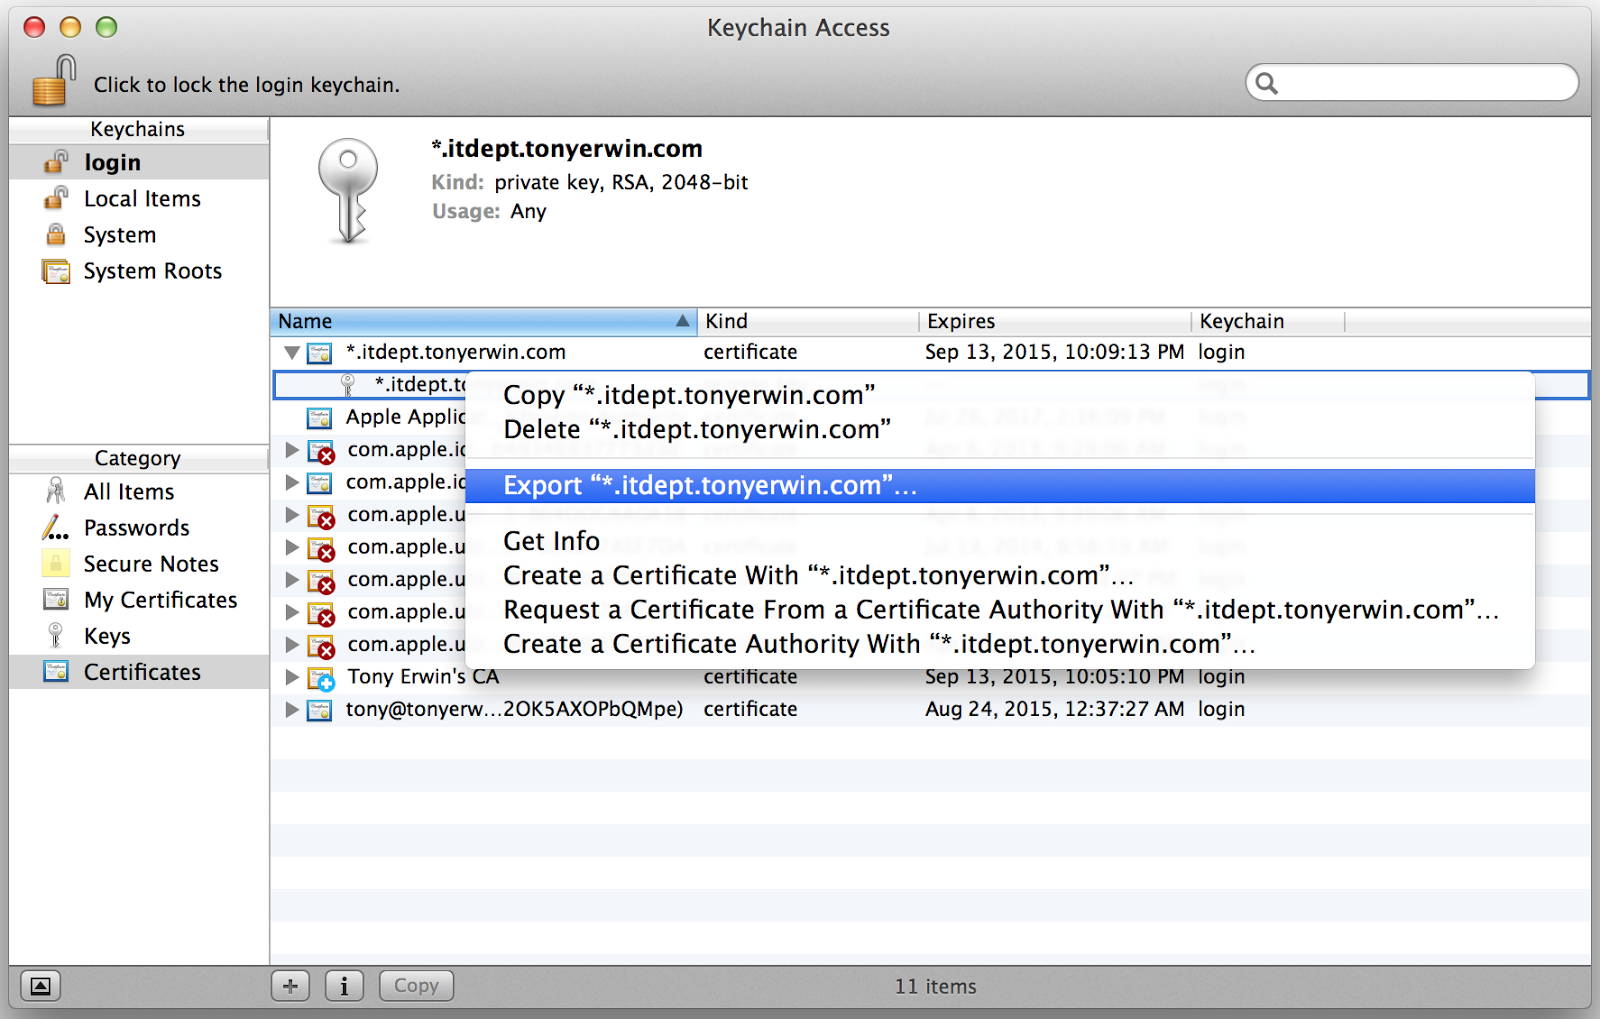
- Now, find your private key in the Keychain Assistant window. You will need to expand you main certificate to see it. Right-click on it and choose the Export option.
- You will then see a dialog asking for a password to use to protect your file. Enter a password and confirm it (also be sure to remember it for later!), and click OK.
- Next you will be asked for an administrator password for your system. After entering your credentials, click Allow.
- You will then be asked for a location for the exported key. You can enter a file name (for example,
server), and you’ll want to pick the same directory you chose for your exported certificate. For File Format, choose Personal Information Exchange (.p12). Click Save. - Next, find your certificate authority in Keychain Assistant. Like you did for your main certificate, choose the Export option from the context menu.
- You will now see another file chooser. I entered
cafor the filename, but you can choose whatever you like. However, be sure to pick Certificate (.cer) for File Format. Make sure you’ve chosen the same directory you used for exporting the first two files, and click Save.
Convert Your Private Key
You’ve exported the required files, and you’re almost done! But, there’s one more important step. Because Bluemix does not yet support p12 key files, you will need to use openssl to do a quick conversion. If you’ve gotten this far, it should be pretty straightforward because openssl is installed on your Mac. Go to the command line and change to the directory where you exported all of your files. Then, execute the command below (which came from a StackOverflow post). If you chose server.p12 for your key file name, then you can execute the command as is. Otherwise, you will need to enter your personal file name. When it asks for a password, use the same password you specified to protect the private key file when you exported it.
1
2
3
4
$ openssl pkcs12 -in server.p12 -nocerts -nodes | openssl rsa > server.key
Enter Import Password:
MAC verified OK
writing RSA key
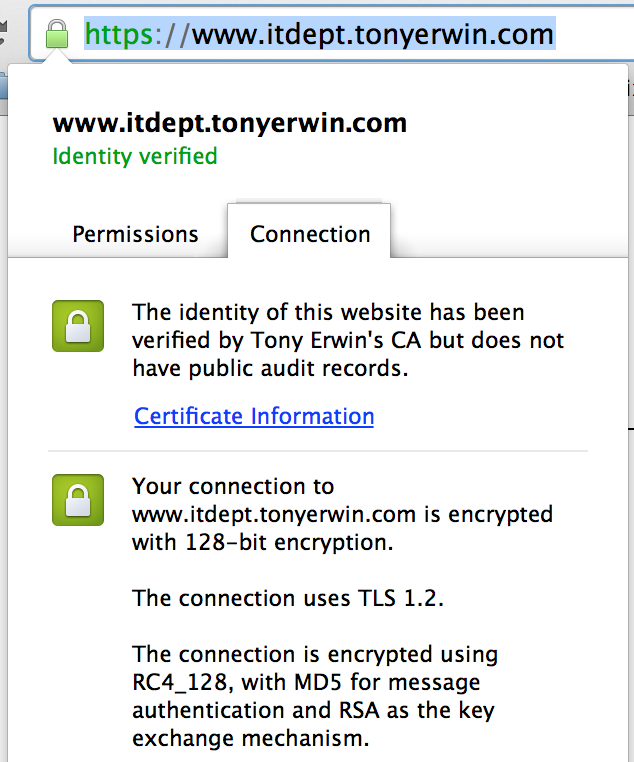
Final Result with Keychain Assistant
At this point, you should have a .cer file for your main certificate, a .key file for your private key, and a .cer file for your intermediate certificate. You can now use the Bluemix UI to upload those files and secure your own domain. I did this myself. And, when I access my app using Chrome on my personal Mac, I see the identity is verified and there are no security warnings. However, this is because we told Keychain Access to trust our self-signed certificate authority. So, of course, if someone tries to access the app from another system they will still get a security warning.
Conclusion
Self-signed certificates should never be used for production apps, but you’ve seen they have value for testing and development. I presented steps for three different approaches to creating self-signed certificates appropriate for use with your Bluemix apps. These included online generation, manually executing openssl commands, and using the Mac’s Keychain Access app. In the last case, you also saw how a self-signed intermediate certificate can be marked as “trusted” to eliminate browser security warnings when running locally. After using any of these approaches, you can upload the resulting certificate and key files using the Bluemix UI to associate them with a custom domain. See my other post for full details on how to do that.